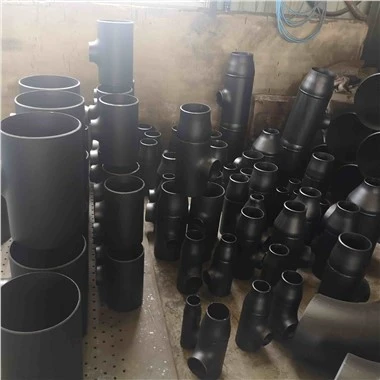

Hey there! I'm a supplier of Pipe Fittings, and today I'm gonna share with you how to install pipe fittings properly. Whether you're a DIY enthusiast or a professional plumber, getting the installation right is crucial for a leak - free and long - lasting plumbing system.
1. Preparation
Before you start installing any pipe fittings, you need to do some prep work. First off, measure the pipes accurately. You don't want to end up with fittings that are either too big or too small. Grab a good quality tape measure and double - check your measurements.
Next, gather all the tools you'll need. This usually includes a pipe cutter, a deburring tool, a wrench, and some sealant. Make sure your tools are clean and in good working condition. A dull pipe cutter can make uneven cuts, which will lead to problems when you try to connect the fittings.
Also, it's a good idea to clean the pipes and fittings. Use a clean cloth to wipe away any dirt, dust, or grease. This will ensure a better seal when you connect them.
2. Types of Pipe Fittings and Their Installation
Metal Pipe Fittings
Metal pipe fittings, like those you can find here, are commonly used in many plumbing systems. They're durable and can handle high pressures.
When installing metal pipe fittings, you'll often use threaded connections. First, make sure the threads on the pipe and the fitting are clean and free of damage. Apply some pipe thread sealant to the male threads. This helps prevent leaks. Then, carefully screw the fitting onto the pipe. Use a wrench to tighten it, but don't over - tighten. Over - tightening can damage the threads and cause leaks in the long run.
Another type of connection for metal pipes is the compression fitting. This involves using a compression nut and a ferrule. Slide the compression nut onto the pipe first, followed by the ferrule. Then insert the pipe into the fitting and tighten the nut. The ferrule will compress against the pipe and the fitting, creating a seal.


Soil Pipe Fittings
Soil pipe fittings, such as the ones on this page, are used for waste and drainage systems. These fittings are usually made of cast iron or plastic.
If you're using cast iron soil pipe fittings, you'll likely use a hub and spigot connection. Clean the hub and the spigot of the pipe. Apply a special joint compound to the spigot. Then insert the spigot into the hub and use a caulking material to seal the joint. Make sure the caulking is evenly distributed to prevent leaks.
For plastic soil pipe fittings, a solvent weld is often used. Cut the pipe to the right length and clean the ends. Apply the solvent weld primer to the pipe and the fitting. Then apply the solvent cement and quickly join the parts together. Hold them in place for a few seconds until the cement sets.
Plastic Pipe Connectors
Plastic pipe connectors, available here, are lightweight and easy to install. They're often used in water supply and drainage systems.
For many plastic pipe connectors, you can use a push - fit system. Just make sure the pipe ends are clean and cut straight. Insert the pipe into the connector until it clicks into place. Some push - fit connectors also have an O - ring for an extra - tight seal.
If you're using a threaded plastic pipe connection, be careful not to overtighten. Plastic can crack more easily than metal. Apply a small amount of a suitable sealant to the threads and then screw the parts together gently.
3. Testing the Installation
Once you've installed all the pipe fittings, it's time to test the system. Turn on the water supply slowly. Check for any leaks at the joints. You can do this by looking for drips or by feeling around the connections.
If you find a leak, don't panic. First, turn off the water supply. Then, depending on the type of fitting, you may be able to tighten a nut or add more sealant. If the problem persists, you might need to replace the fitting.
4. Safety Tips
Safety is super important when installing pipe fittings. Wear safety glasses to protect your eyes from any flying debris when cutting pipes. If you're using solvents or sealants, make sure you're in a well - ventilated area. Some of these chemicals can be harmful if inhaled.
Also, be careful when using tools. A sharp pipe cutter or a wrench can cause injuries if not used properly. Keep your work area clean and organized to avoid tripping hazards.
5. Troubleshooting
Sometimes, things don't go as planned during installation. Here are some common problems and how to fix them:
- Leaking joints: As mentioned before, first check if you can tighten the fitting. If that doesn't work, remove the fitting, clean the parts, and apply more sealant. If the threads are damaged, you may need to replace the fitting.
- Pipe not fitting properly: Double - check your measurements. If the pipe is too long, cut it to the correct length. If it's too short, you may need to get a new piece of pipe.
- Cracked fittings: If you notice a crack in a fitting, replace it immediately. A cracked fitting can lead to major leaks and damage to your plumbing system.
Why Choose Our Pipe Fittings?
As a pipe fittings supplier, we offer a wide range of high - quality products. Our fittings are made from top - notch materials, ensuring durability and reliability. We have a team of experts who can provide you with technical support and advice. Whether you're working on a small home project or a large commercial one, we've got the right fittings for you.
If you're interested in our products or have any questions about pipe fitting installation, don't hesitate to reach out. We're here to help you make your plumbing project a success. Just start a conversation with us, and we can discuss your needs and requirements.
References
- "Plumbing Handbook" by John Doe
- "Pipe Fitting Installation Guide" by ABC Publishing